Lift-Up Conditional Introduction
Introduction to the “Lift-Up Conditional” refactoring to detangle complex if statements. There is a follow-up learning hour using this technique. We suggest you plan to do both of these learning hours.
Learning Goals
- Use Keyboard shortcuts to do Lift-Up Conditional on a simple example
Session Outline
- 10 min connect: If-parsing exercise
- 10 min concept: Lift-Up Conditional
- 20 min concrete: Do Lift-Up Conditional on practice exercise
- 10 min concept: Lift-Up Conditional on Gilded Rose
- 5 min conclusions: Note shortcuts
Connect: if-parsing exercise
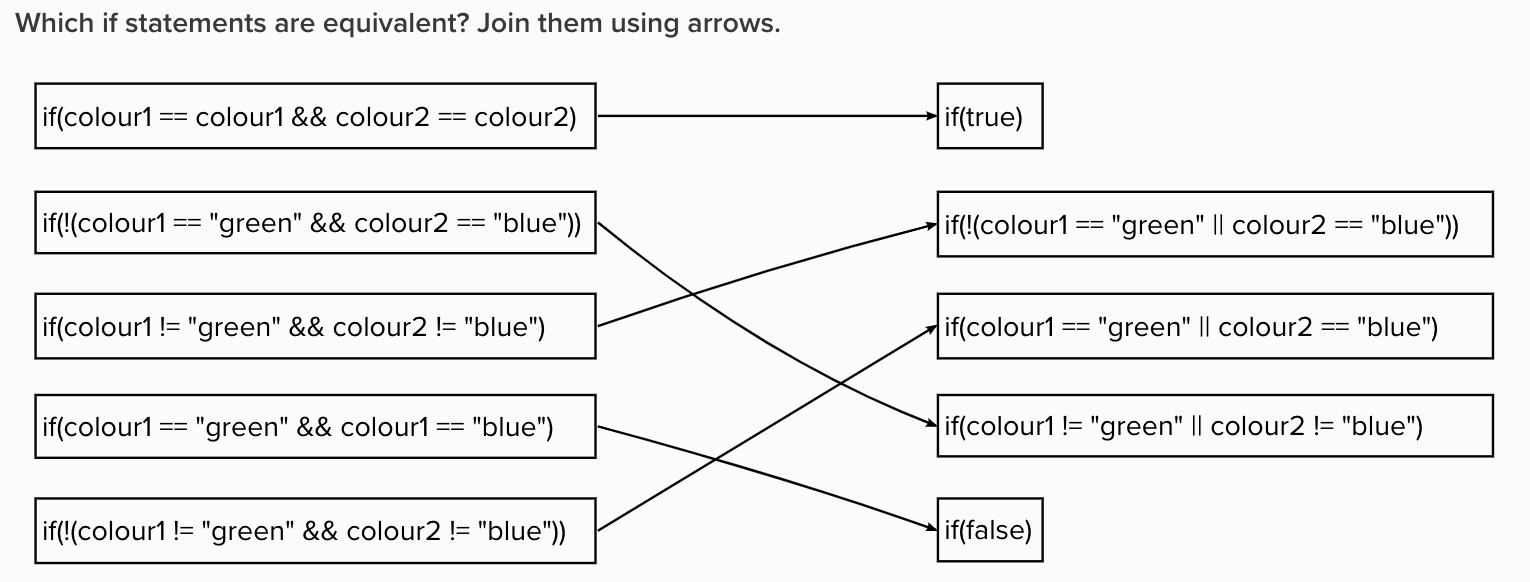
In pairs: Which if statements are equivalent? Join them up. Because they are about to parse and detangle a complex nested if statement, this is a good exercise to get them used to thinking about conditional logic.
Below are the if statements I use, each statement paired with the correct answer. You can use a visual tool like Miro or Mural to join text boxes with arrows, or print them out on paper, or find another technique that fits your situation.
If you want to add your own equivalent if statements, you might like to use this C# test code I created to check each if statement is definitely equivalent (the link takes you to a method that demonstrates how the tests work).
// First pair
if(colour1 == colour1 && colour2 == colour2)
if(true)

// Second pair
if(colour1 == "green" && colour1 == "blue")
if(false)

// Third pair
if(colour1 != "green" && colour2 != "blue")
if(!(colour1 == "green" || colour2 == "blue"))

// Fourth pair
if(!(colour1 != "green" && colour2 != "blue"))
if(colour1 == "green" || colour2 == "blue")

// Fifth pair
if(!(colour1 == "green" && colour2 == "blue"))
if(colour1 != "green" || colour2 != "blue")
Below is a sample of what the solution looks like in Mural. I suggest that, if using a tool like Mural or Miro, you create a separate frame for each pair to use for the exercise. You can create a separate frame containing the solution, which stays hidden until they’ve done the exercise themselves.

Concept part 1: Lift-Up Conditional
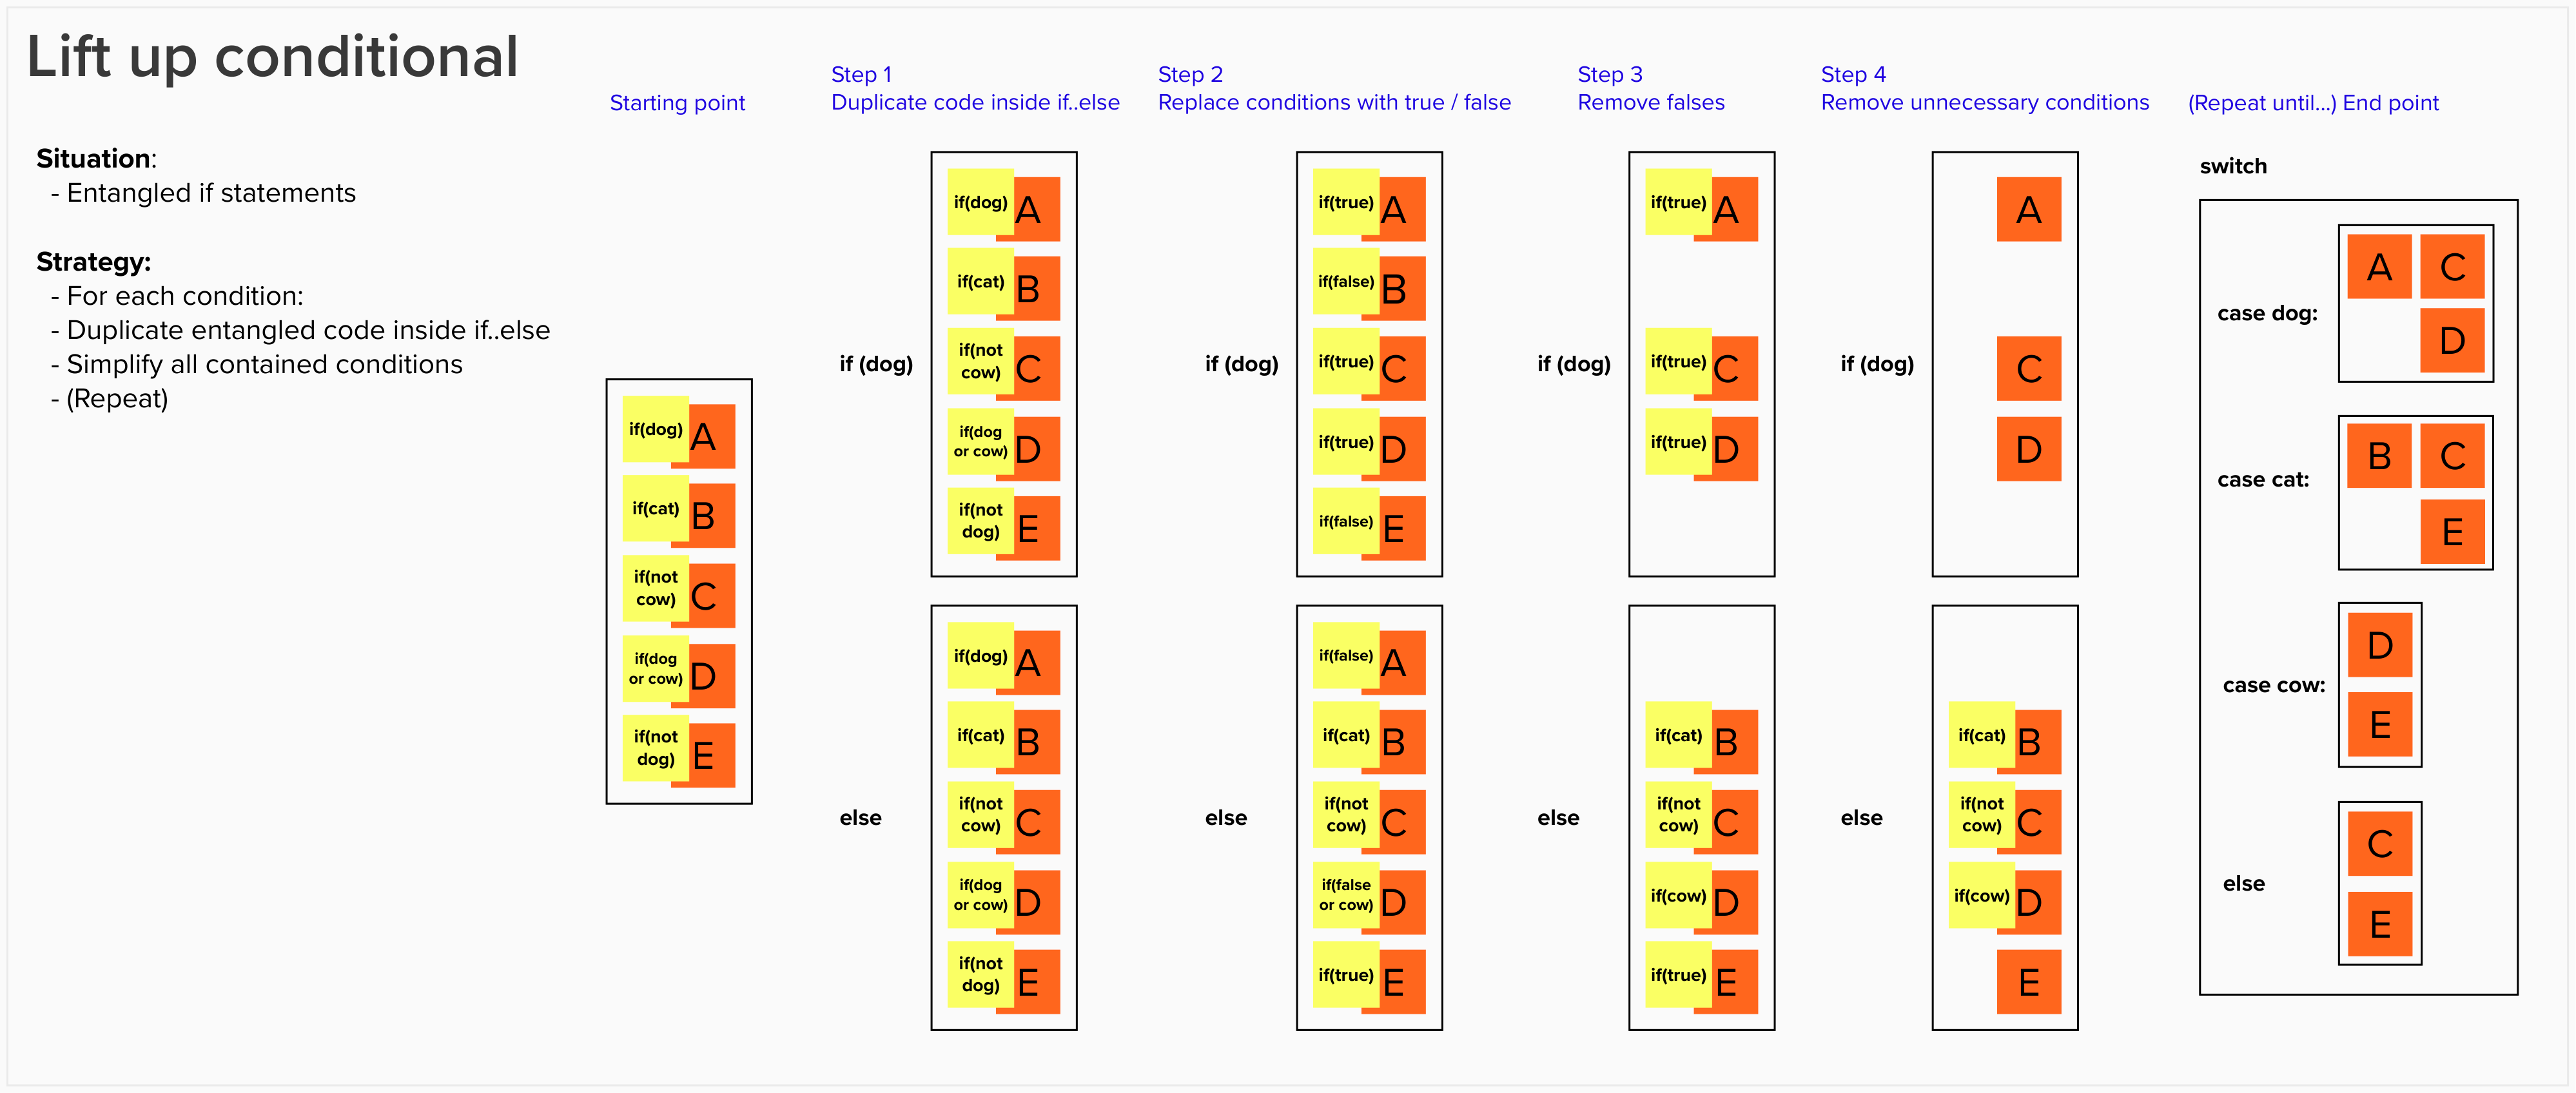
I find it helpful to use schematics to visualise what’s happening, as if you haven’t seen the technique before it can be confusing at first.

Concept part 2: Lift-Up Conditional Demo
Demonstrate the technique on a simple conditional first. For example:
void a_true_b_true() {}

void a_true_b_false() {}

void a_false_b_true() {}

void a_false_b_false() {}

void lift_up_conditional(bool a, bool b) {
    if (a) {
        if (b) {
            a_true_b_true();
        } else {
            a_true_b_false();
        }
    } else {
        if (b) {
            a_false_b_true();
        } else {
            a_false_b_false();
        }
    }
}
You can use the Lift-Up Conditional demo code to demonstrate how to lift-up the if (b) condition.
Show the keyboard shortcuts you are using, and write them up on a list where people can see them.
Concrete: practice using keyboard shortcuts
Ask people to do the same exercise you just demoed, and use the keyboard shortcuts in their IDE.
Concept: Lift-Up Conditional on Gilded Rose
Show the complex conditional in Gilded Rose and how you can use this technique to simplify it. If you are doing the follow-up learning hour using this technique, it is the same demo. You might not show the whole demo today, but you can make a start. It helps to see it twice :-)
Conclusions:
Ask them to write a sticky note to remind them of something they learnt today. A technique / approach / tool that you liked in particular?
